07 Jul 2021, updated: 21 Oct 2021
This tutorial will show you how to configure Charles and your Android 11 device so you can view your app’s network traffic in plain text. FYI, the root certificate installation steps are slightly different to older Android versions
NOTE: Since Android Nougat (7.1), Google have blocked tools like Charles from intercepting/decrypting network traffic from Play Store apps
NOTE: To proceed with this tutorial, you will need to be able to build your own Android app. Make sure the “Network Security Config File” has been added to your app’s repo (see more details here and here).
Prerequisites
Be able to build your own Android app
Make sure you have setup the Charles Root certificate on your Mac
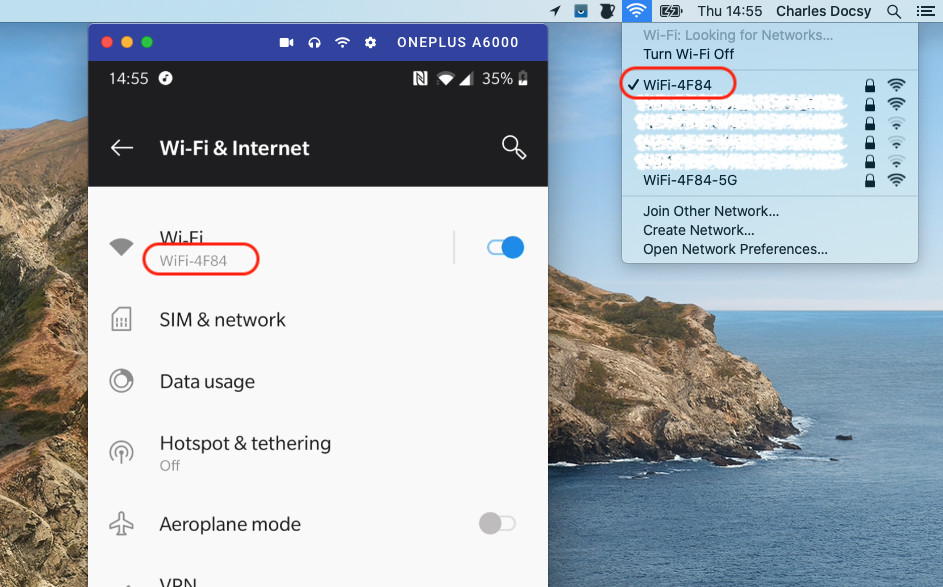
Check Wi-fi networks
Make sure your Mac and Android device are on the same Wi-Fi network
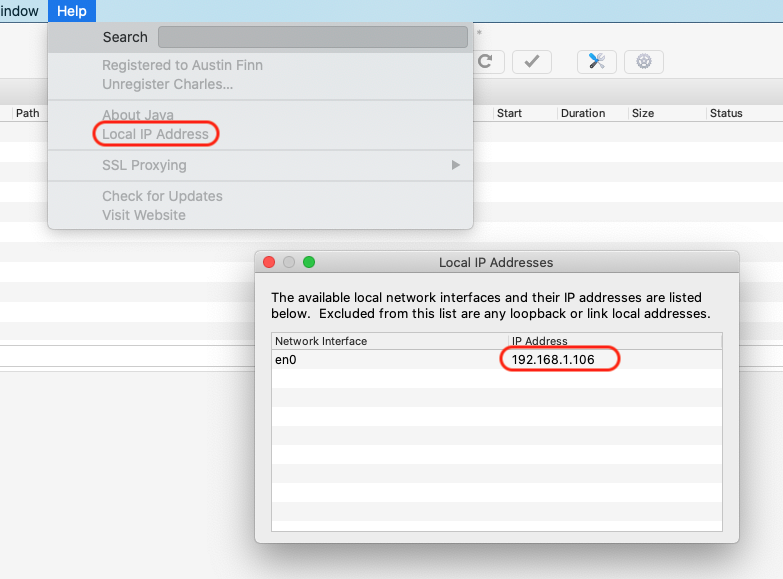
Find your Mac’s local IP address
Open Charles -> Help -> Local IP address.
Make note of the IP address as you will need to enter it into your device later
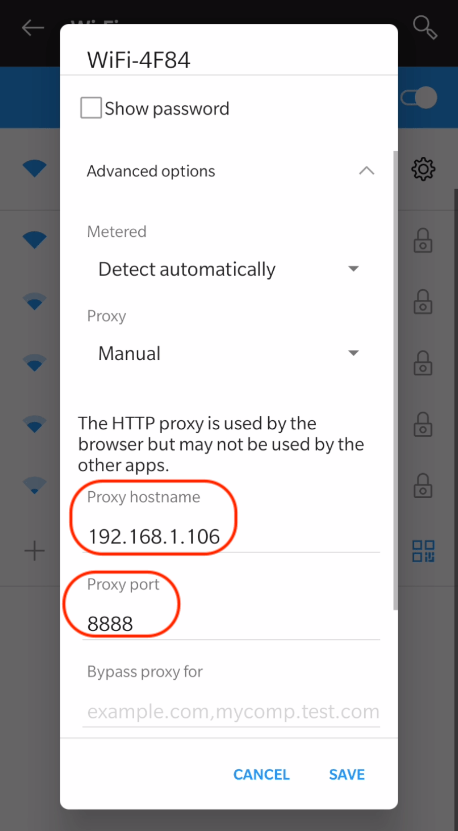
Navigate to device’s Wi-Fi proxy screen
Settings -> Wi-fi -> long press the connected Wi-Fi network to bring up the menu -> Modify -> Advanced options -> select “Manual” from the proxy drop down
NOTE: there are slight navigation differences between OS versions in how to get to your Wifi proxy settings but they should be fairly similar to these screenshots

Configure device’s proxy settings
This step will proxy all your device’s internet traffic through your laptop
- Proxy hostname: this is your Mac’s local IP address
- Proxy Port: 8888
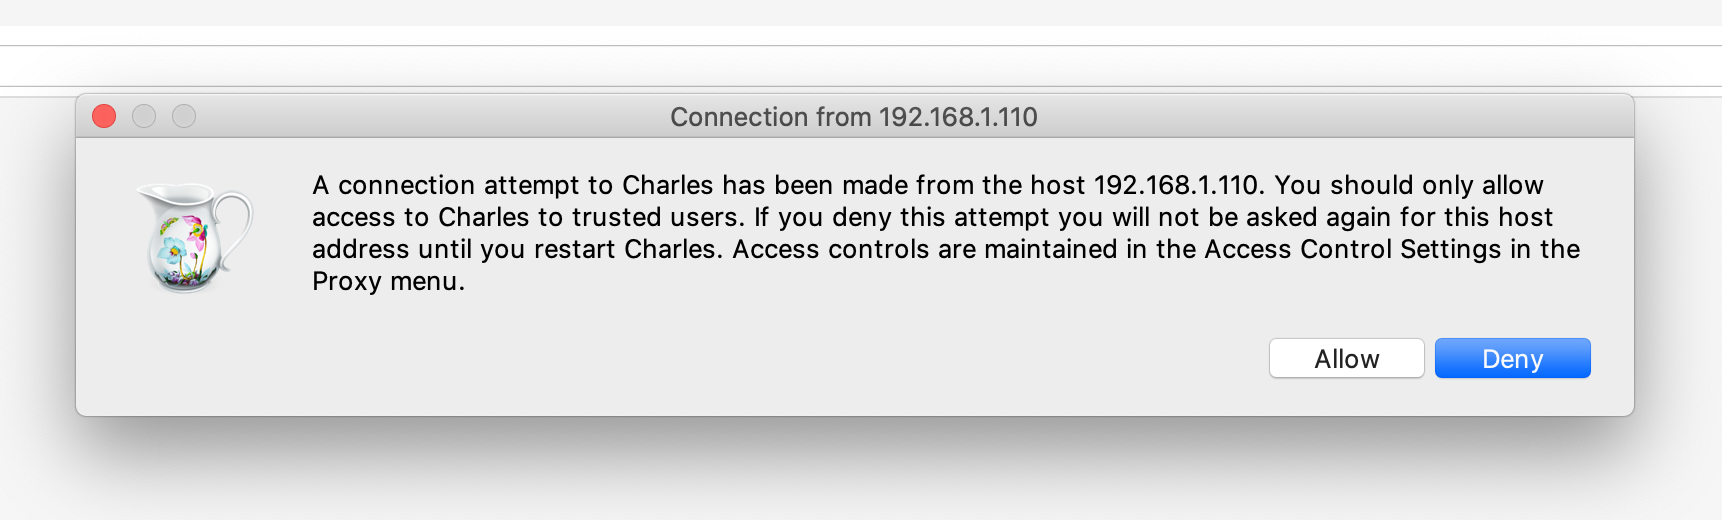
Accept incoming network traffic from your device
On your device, open Chrome and go to a website
Return to your Mac. You should now see this prompt from Charles. Click “Allow”
Encrypted traffic from the device should now appear in Charles
Download Root certificate for device
Return to the device, open Chrome and go to chls.pro/ssl.
Tap “Download”

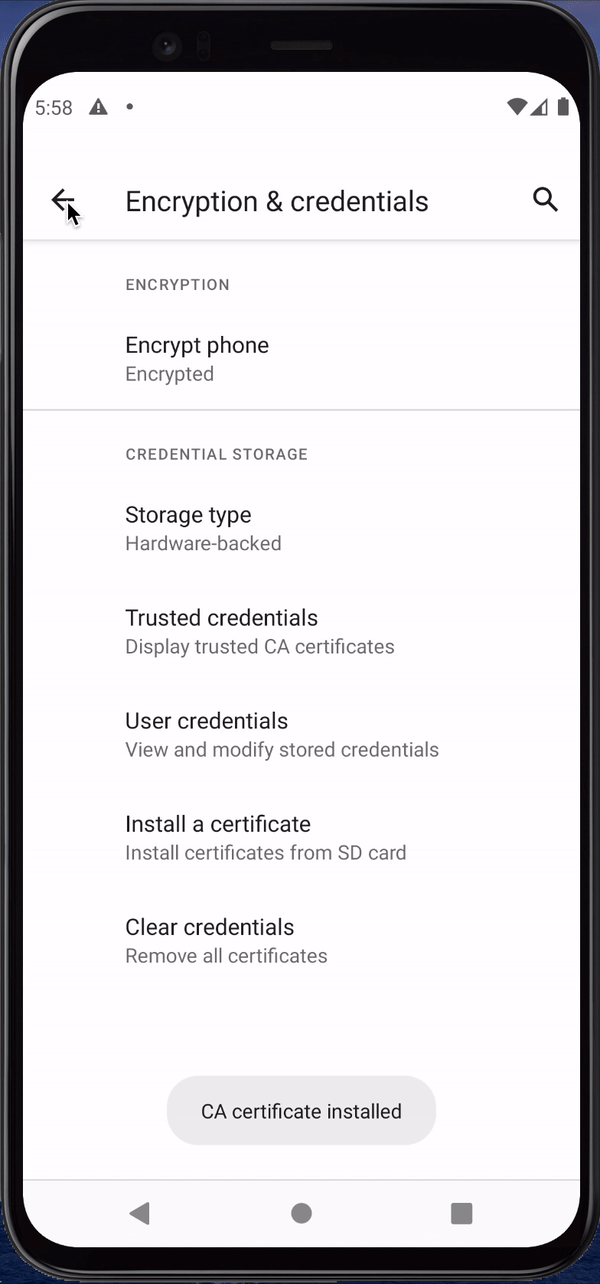
Install root certificate
Open the “Setting” app -> Security -> Encryption & Credentials -> Install a Certificate -> CA certificate -> Install anyways -> tap on the certificate
Android may prompt you to enter pin, password or fingerprint before installing the root certificate

Verify root certificate has been “trusted”
Return to Encryption & Credentials. Tap Trusted credentials -> USER
You should now see a certificate from “XK72 Ltd” appear
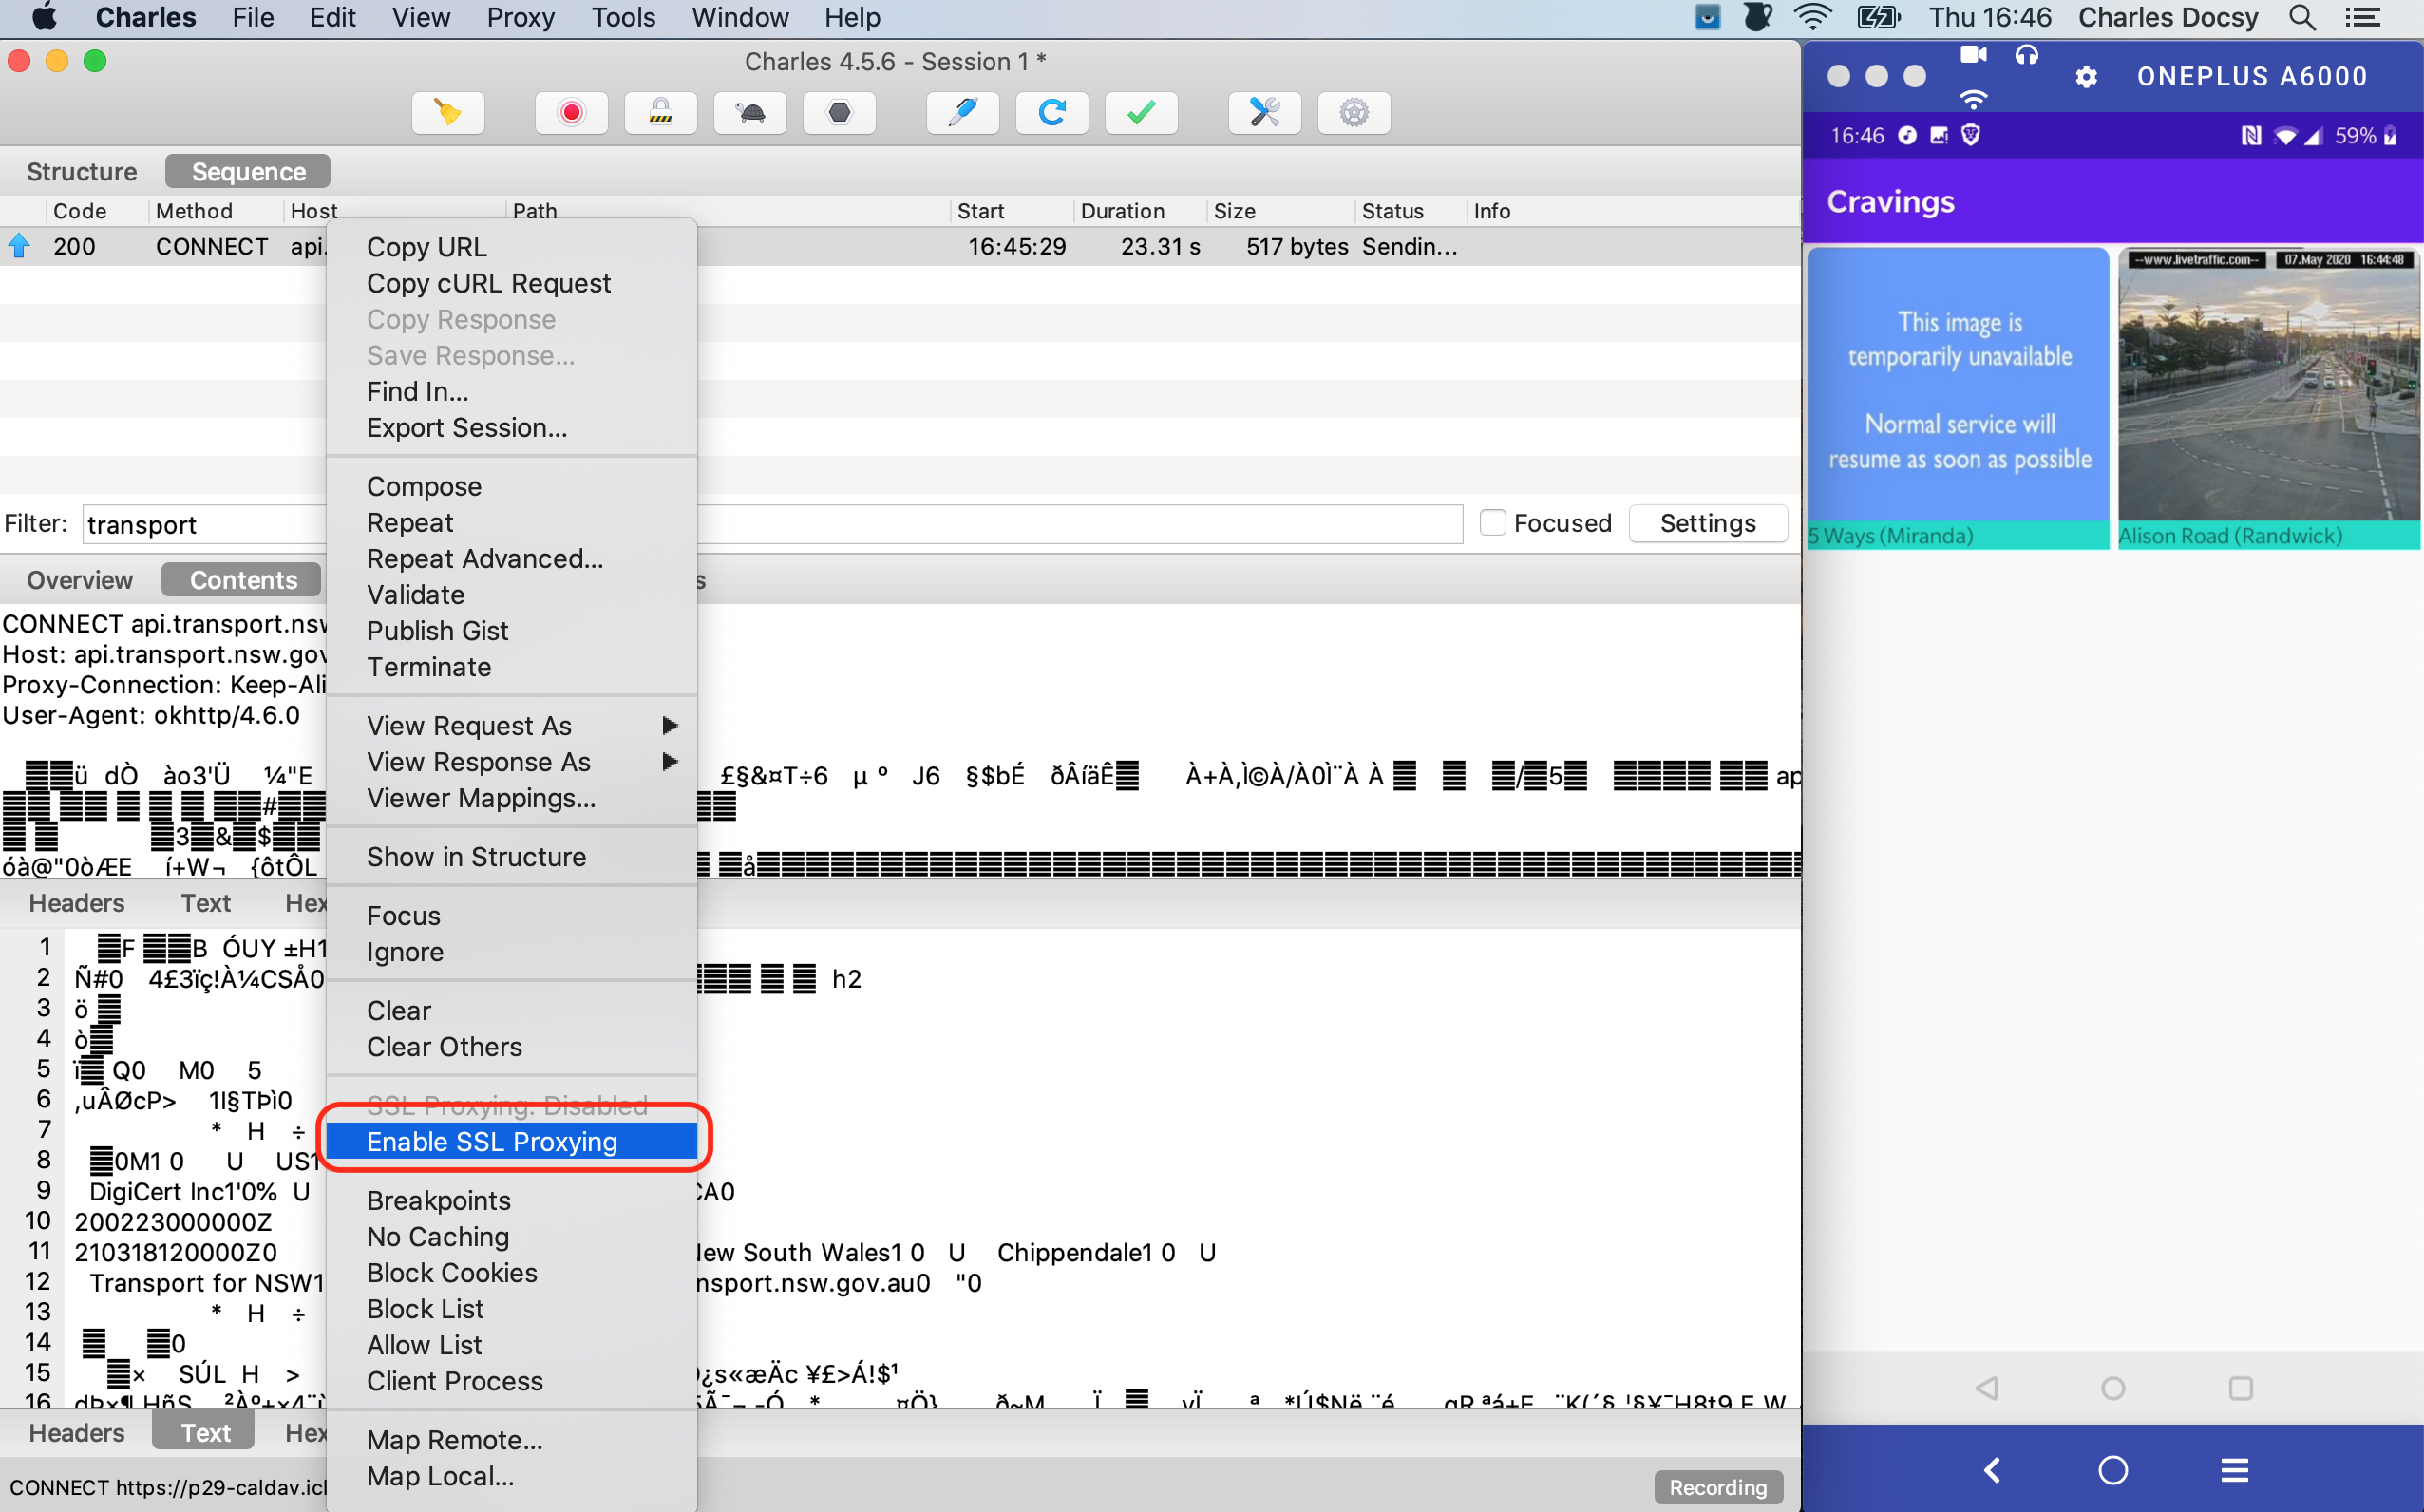
Enable SSL proxying to view traffic in plain text
Return to Charles, right click the network request you are interested in and click the “Enable SSL Proxying” option
FYI, I am using an Android app a friend created to demonstrate decrypting Android app traffic
NOTE: As mentioned at the start of the article, you need the ability to build your own Android app to view decrypted traffic. This step will not work with an app downloaded from the Play Store
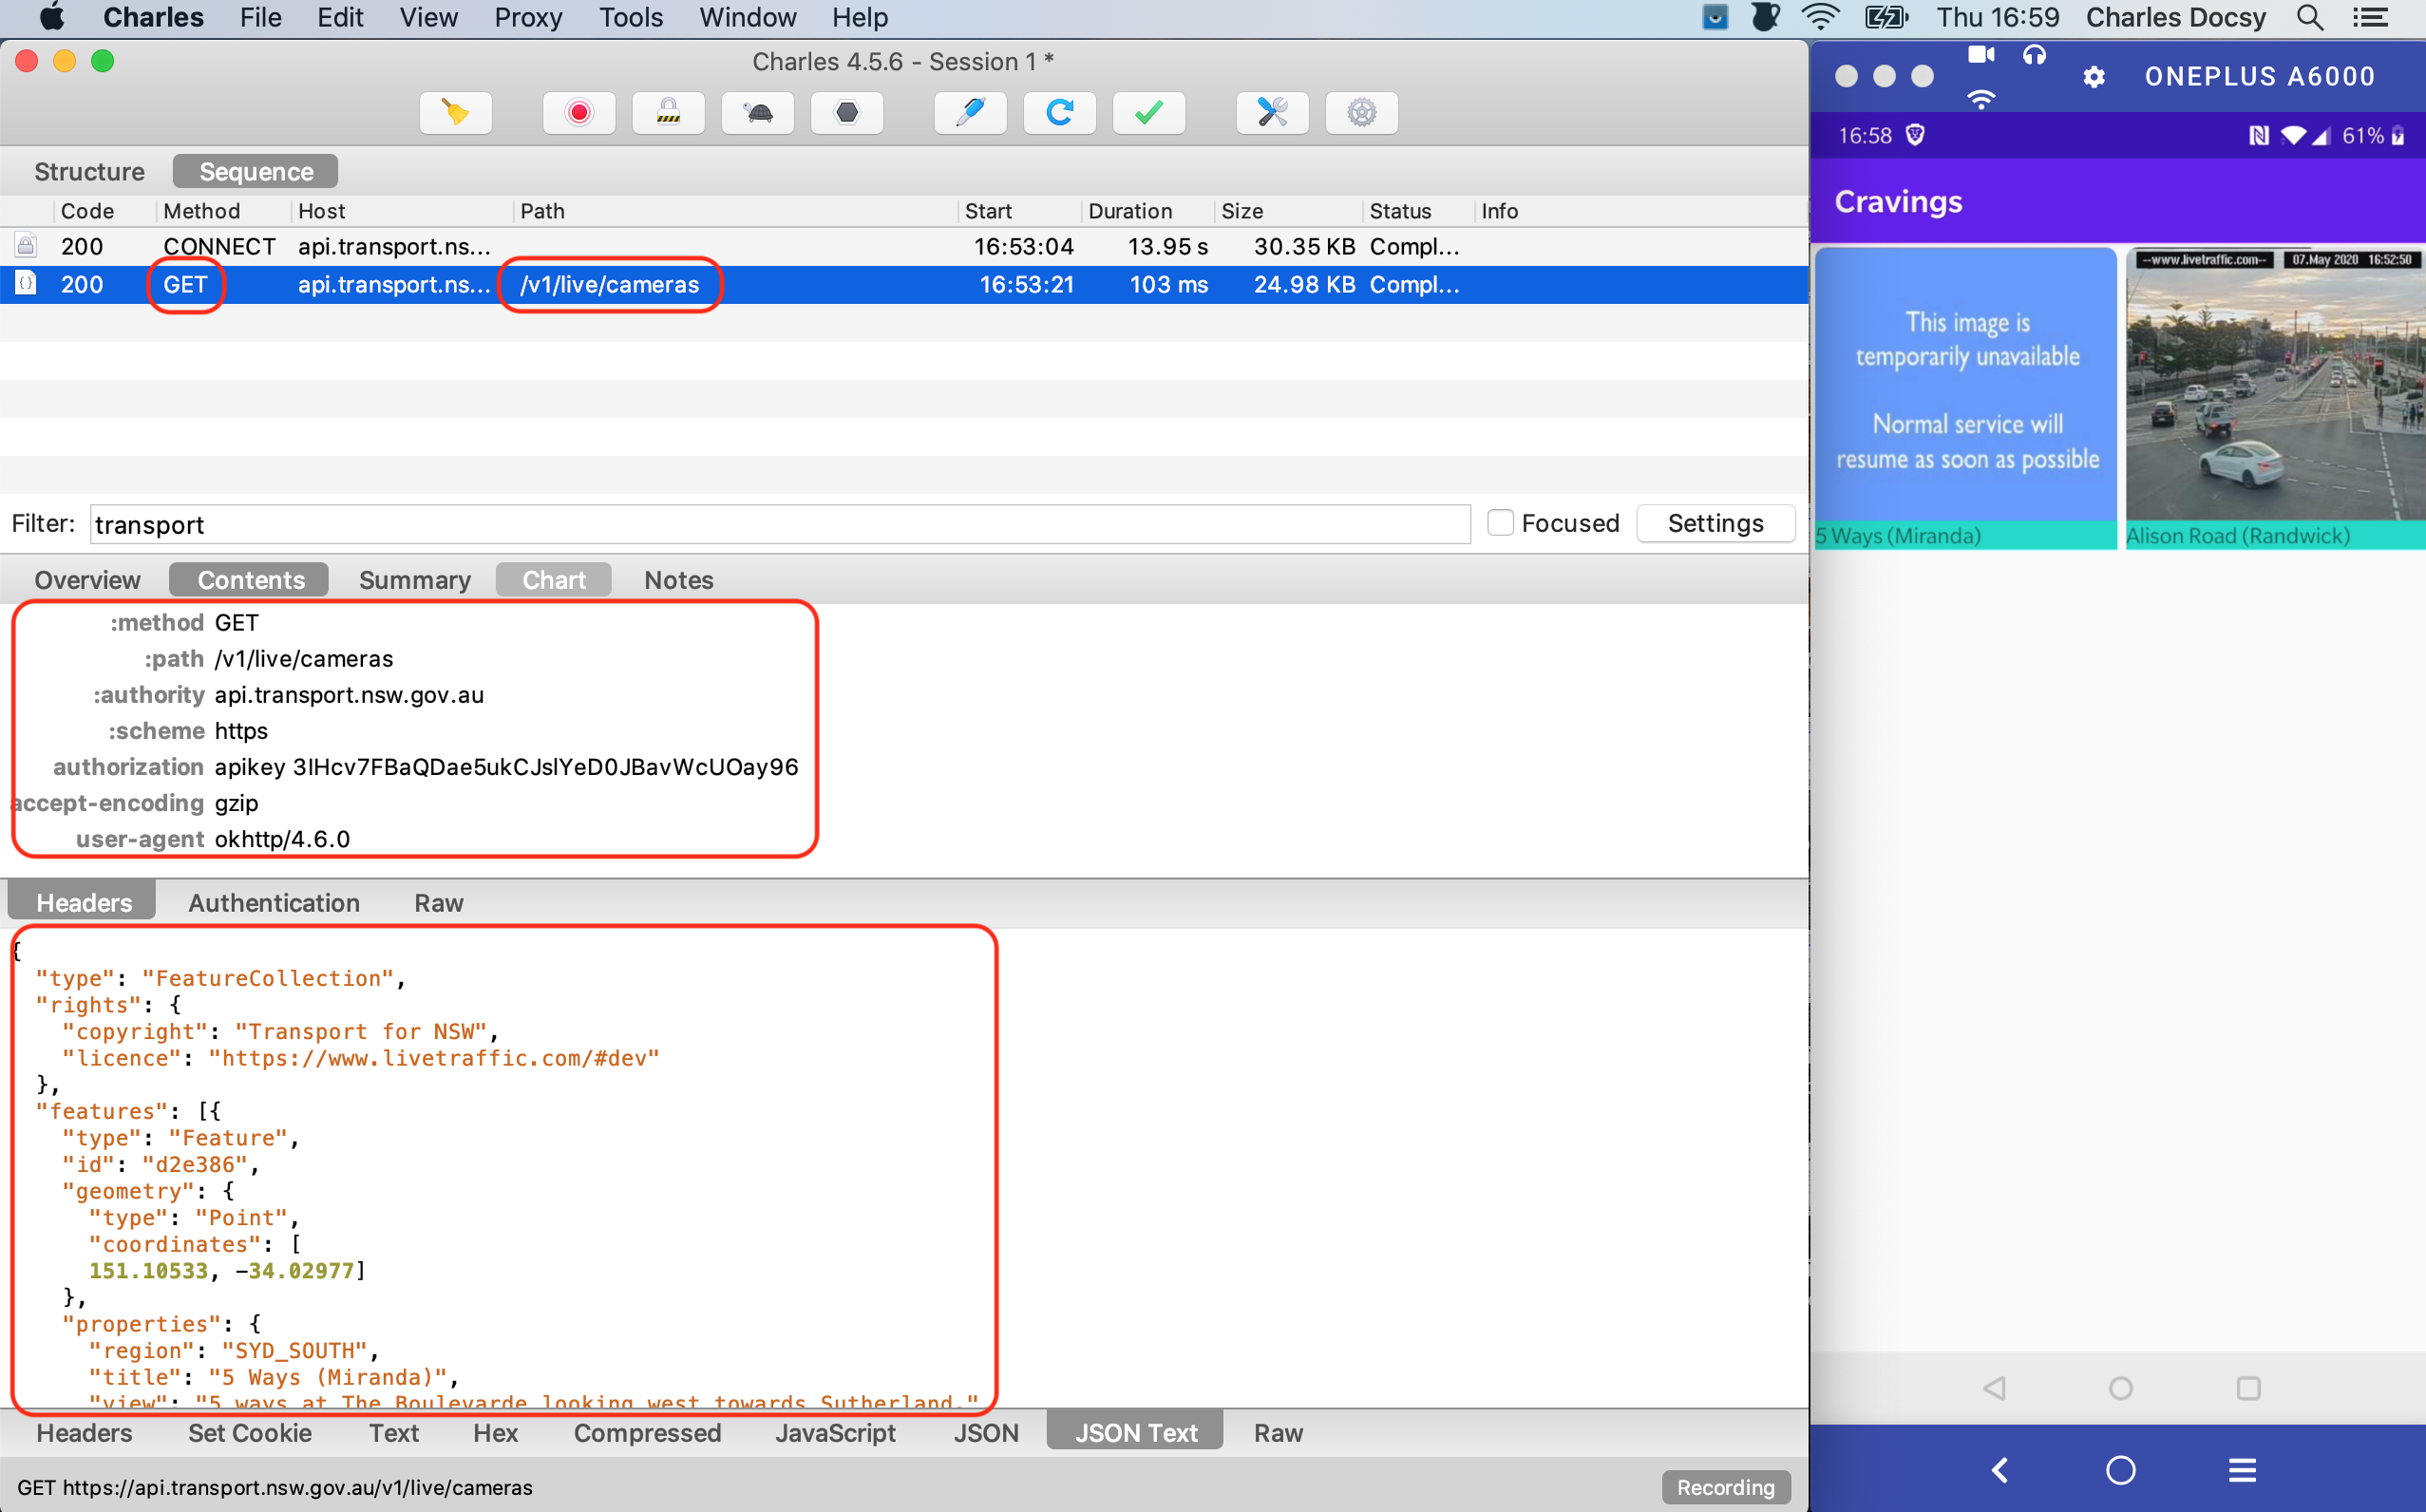
Kill and Reopen app
Kill and reopen the app. You should now see the network request details in plain text
Having problems?
See common Android problems for more help

